Friday, September 22, 2017

CZ P-10C - Possible Failure to Fire Problem

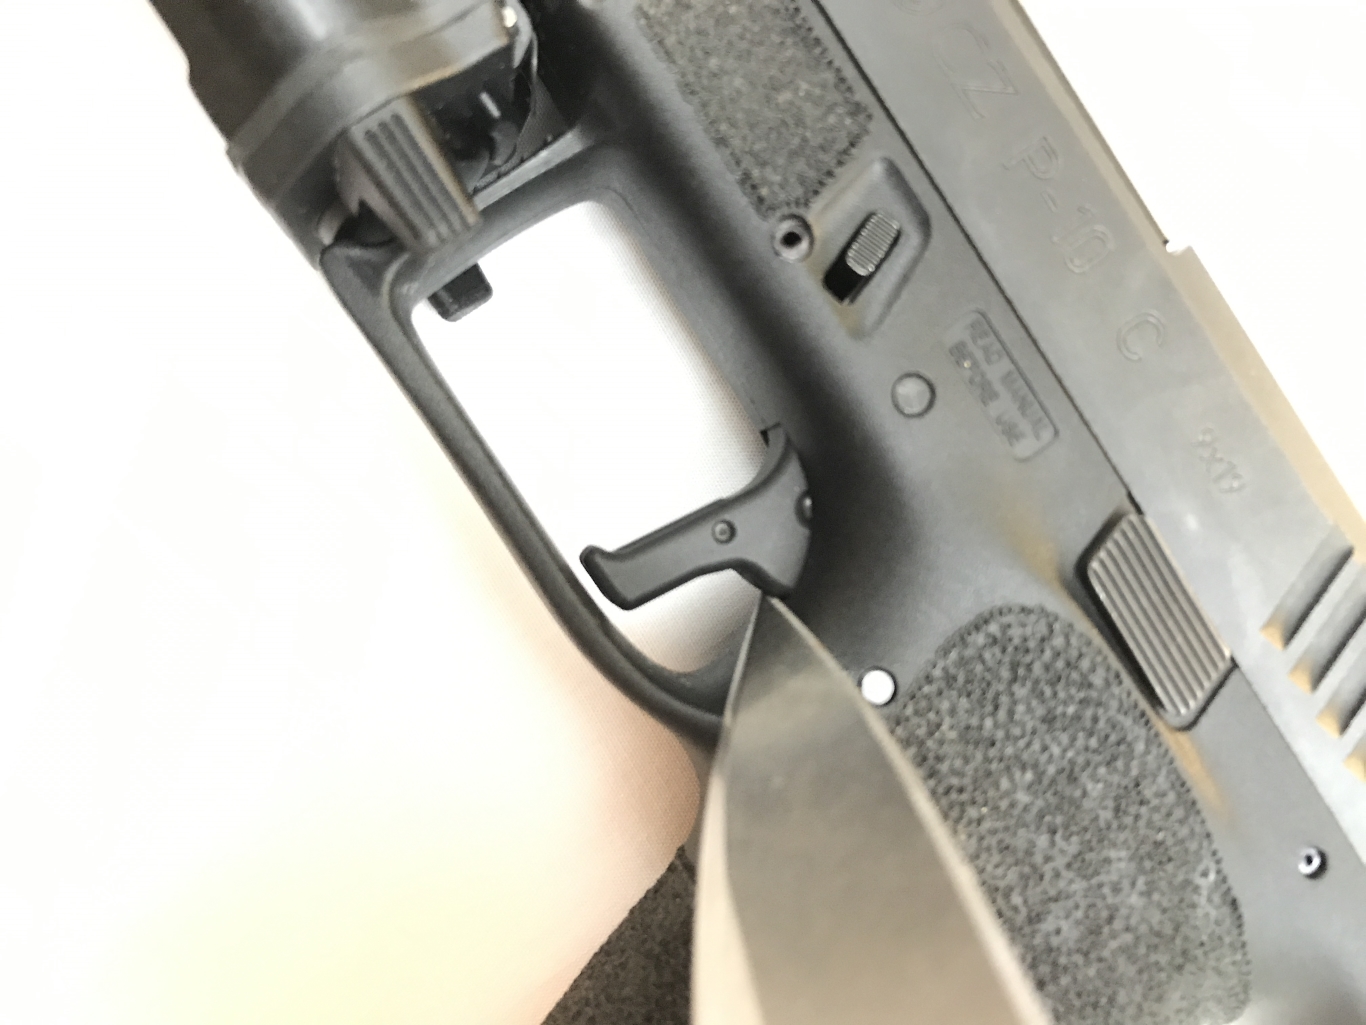
The trigger on my black P-10 started failing to fire lately even after I swapped back in the factory trigger.  I could pull the trigger fully to the rear and the striker wouldn't release.  This only occurred occasionally during dry-fire, never with live ammo.  It's not the trigger but a combination of the trigger bar and the striker sleeve.  Compared to my FDE trigger bar, the "hook" that catches the striker leg sticks up about 1/8" higher when fully back.  Normally, it's still low enough to release the striker except when the slide and slide plate are pushed down.  The striker liner is flexible enough to allow the whole assembly to squeeze slightly out of the slide's striker channel.  The resulting lowering of the striker leg, means the trigger bar can't move down far enough to cleanly release it.  If I push the cover plate up, it raises the striker enough to release from the trigger bar.  I swapped, strikers, trigger bars, connectors, and the rear housings around, but the only thing that made a difference was the trigger bar.  Examining the two, the lug on the FDE is cut lower, resulting in a higher "hook".  


With striker fired guns, I've always noticed more consistent trigger pulls with a mag full of dummy rounds.  The rounds provide more magazine spring pressure to force the slide to its highest position on the rails, while with no dummy ammo/mag, the slide is pretty much free to rest at any height.  The P-10C has a pretty sloppy slide to rail fit for reliability (normal for striker fired guns) and the cover plate has some movement which exacerbates the inconsistency.  When fitting Ghost connectors with over-travel tabs for my Glocks, I always push the slide down while dry firing to ensure the trigger bar will always release the striker.
The biggest issue is the striker housing.  Since its plastic and open at the rear, the slot can get squeezed if you press the slide cover down, and the spring pressure can hold it there.  I think it's the reason for one FTRTBs I had when the plate dropped enough to hang on the rear of the trigger housing, preventing the last 1/8" of slide travel. Some newer P-10C have a bevel on the slide plate to let it ride back up if it gets too low.  Fortunately, when in battery, the slide plate does limit the amount the striker assembly can drop down.  Short of sending my P-10C back to CZ (I've modified mine enough that I probably voided the warranty) I think the immediate solution is to bevel the bottom front edges of the slide cover plate, and shave 0.010" off the trigger bar on the mill.  I have a feeling I'll be overhauling some of my parts once spares become available.


***Update***

I sanded a bevel onto the retaining plate to match the ramp on the center leg.  The plate will now be forced up as the slide goes into battery instead of catching.  I also shaved 0.0255" off the ledge on the trigger bar.  I setup the mill to cut the trigger bar at a three degree angle.  I wanted the cut to stop short of the striker safety lug.  I wanted to unsure that the striker didn't hit the "hump" as it travels forward.  Then I cleaned up the edges with an X-fine ceramic stone.  


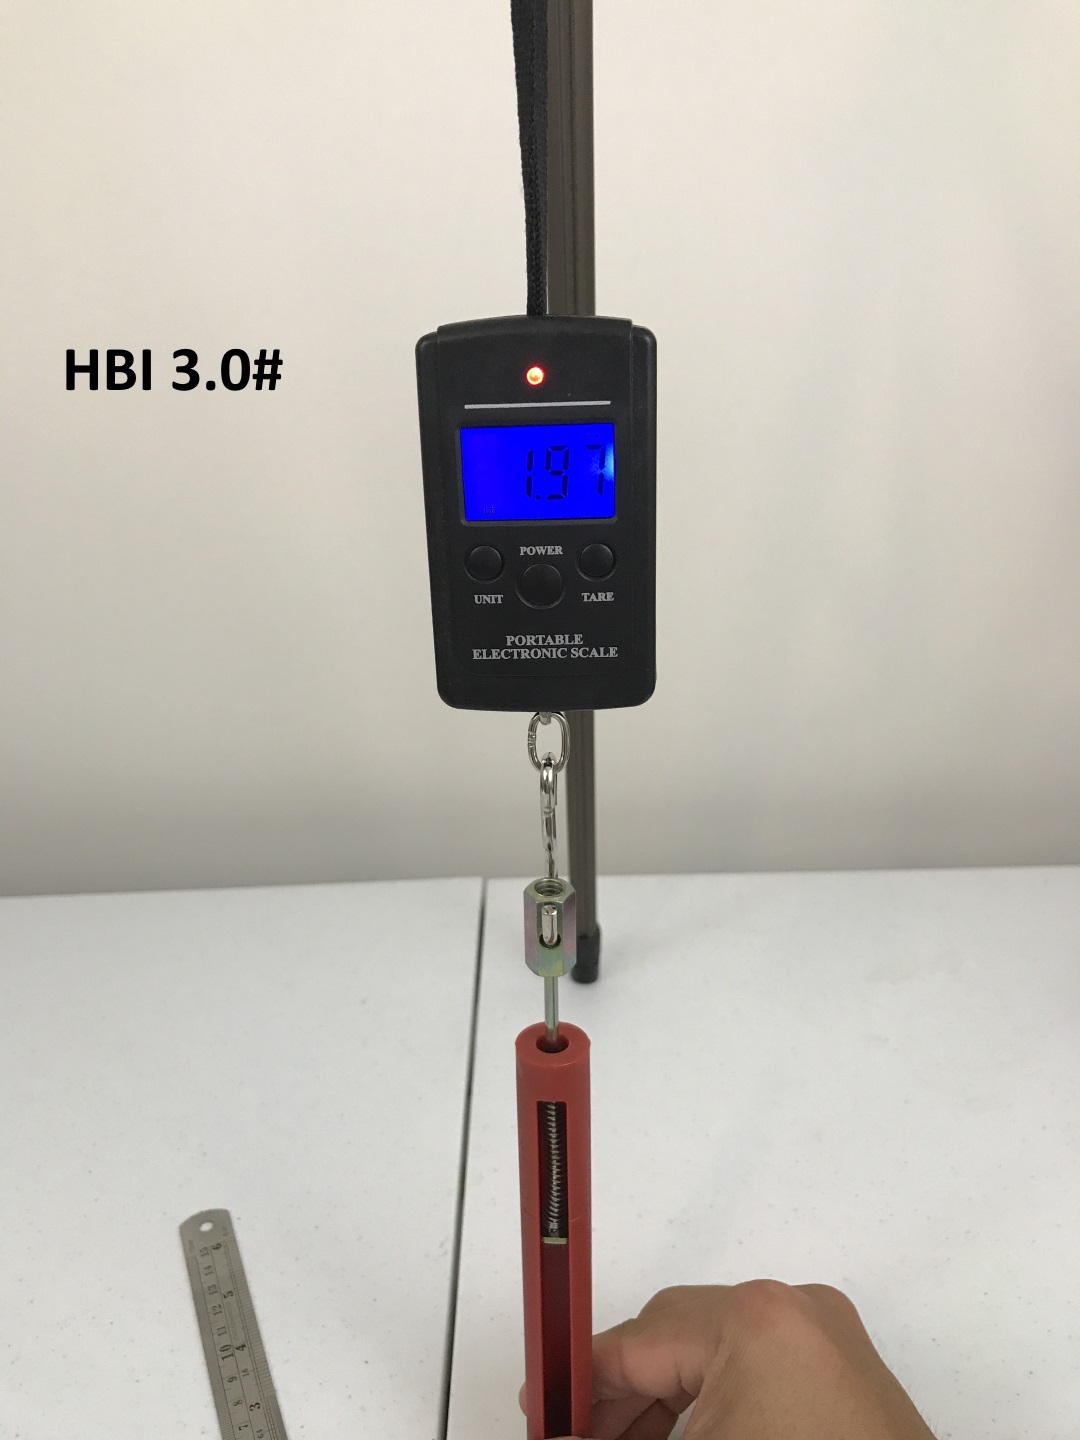
The striker releases 100% now.  Originally the trigger had about 2mm of movement after the wall and zero over-travel.  Now it has about 1mm of movement during the break and 1mm of over-travel.  The break honestly feels like a 1911, just with more take-up.  Not a high-end 1911.  Grab the cheapest new 1911 you can find at a gun store.  That's how the trigger feels.  My only concern is milling into a MIM part.  Unlike barstock, MIM parts are usually only surface hardened.  However, since I didn't cut into the face of the ledge, the exposed metal only contacts the striker leg as the slide recoils backward.  It's held upward by slight pressure from the trigger springs, so impact should be minimal.  I'll monitor it as I shoot it more.


Thursday, September 14, 2017

CZ P-10C - Striker Spring and HBI Trigger Rates

One of my pet peeves is how gun companies rate springs.  Springs are typically rated in force/distance.  Gun companies typically label springs with just pounds.  A Governent 1911's recoil spring weight is the pounds exerted at 1.625" of compression.  Commander? 1.125"  Officers ACP? 0.700".  So when I look at a Glock 5.5# striker spring, what is that actually measuring? 5.5 pounds per inch?  5.5 pounds when cocked in the gun?  A 5.5 pound predicted trigger pull weight?

Who cares right?  Springs are cheap.  Just buy a few and measure the trigger pulls.  But trigger pull doesn't tell the whole story about how a trigger feels.  Take-up and reset are also effected by different spring rates and lengths, as is the energy delivered to the primer.  I'm also a huge nerd and like to geek out on little details.  So if your eyes are glazing over, scroll down to the results below.

I figured that the only way to predict the effects the striker springs in my P-10C, would be to find their spring rate (pounds/inch) and calculate the spring pressure when the striker is in various positions in the slide.  I picked up a simple spring rater from Brownells and setup a super scientific spring lab.

The Spring "Lab"

Adjusting for 1" of Compression

I used a camera tripod to hang the scale and assembled each spring into the rater.  I pulled the red spring tube down to the table, measured the distance, then adjusted the legs.  I repeated this until the tube consistently hovered 1" above the table surface.  Then I could take a weight reading.  Pulling down on the red tube would compress the spring until it hit the table.  This gave me a rough spring rate in lbs/inch.


Then I measured the length of each springs at rest, and the length of the spring when installed on the striker.  I got 1.371".  Then I had to figure out the distance the striker compresses the spring when it catches on the trigger bar, essentially the half-cocked position.  I removed the striker spring, then measured the distance from the strikers rear face to the exit of the slide at full forward and half-cock.  Subtracting one from the other gave me an approximate distance of 0.316".  With the trigger held to the rear, I could measure the fully cocked striker at 0.437"  Unfortunately, I didn't have enough hands to get photos of measuring the striker positions.

Striker Spring Length Installed

With these measurements I could calculate spring pressure at the forward, half-cock, and break positions.  Here's the raw spreadsheet:


Here it is broken down to % reduction in spring pressure at three striker positions.
FWD is when the striker is fully forward in the slide and free of the trigger.  This is the last bit of "shove" the spring can give the striker before its momentum carries it into the primer.
Half is when the striker is caught on the trigger (trigger forward) at the start of pre-travel.
Break is when the striker is at maximum compression as it's released from the trigger.


Below are the trigger weights for each spring with HBI Theta Trigger, measured from the hook at the bottom of the trigger.


While it's obvious my measurements aren't 100% accurate, the spring weight data does correlate with the observed trigger pull weight.  However, the returns seem to diminish as decreasing striker weight does not scale linearly with weight at the trigger.  The HBI 3.5# reduces striker load at the break by 9% and results in a 9% lighter trigger.  The Wolff 5.0# reduces striker load by 32.6% at the break, but only 19.9% at the trigger. Interestingly enough, the lighter 5# spring has more spring pressure at the full forward position.  

Obviously there are a ton of other variables that effect trigger pull weight.  I'm not about to try to calculate the friction generated by each spring due to the slightly different diameters and number of coils.  No two springs are alike, and neither are guns.  But in my sample size of one, I'm going with the Wolff 5# Glock spring.

***Update***

I figured I should also calculate the amount of energy the spring can deliver to the striker.  I calculated the potential energy in Joules of each spring at the fully cocked position, just before the striker goes forward.  The results were interesting.


Due to the amount of preload, the lightest springs don't necessarily impart less energy.  With its longer starting length, the 3.5# HBI trigger imparts 7% more force on the striker than the stock one even though it reduced trigger pull by 9%.  Again, my measurements aren't perfect and I did not take into account the inertia of each spring or friction.  

Wednesday, September 13, 2017

CZ P-10C - Mag Release Re-Profile Project

Everyone who knows me knows how picky I am about little details.  One of the minor annoyances I have is with the mag release button on my P-10C.  I can feel the top edge of the button dig into my support hand palm.  Early in testing, I experimented with a lighter mag catch spring.  During a class, I accidentally pressed the button with my support hand palm during a string a fire.  Twice.  After putting the factory spring back in, it hasn't happened again, but it's a nagging possibility.  I also didn't like how the abrupt 90 degree angle didn't blend with the lines of the grip.  Unable to leave perfectly good things alone, I fired up Photoshop and came up with this.  I emailed JagerWerks, and they agreed to re-finish it in black nitride when I send it in with my second P-10C slide.


I pulled the release from my FDE and took some measurements.  I figured I could do a 45 degree chamfer, removing only the top full row of checkering.  I clamped the part into the vise in my vertical mill.  I made shallow, climbing passes from the checkering slide until I was happy with the depth, then did the other side.  Here's what I ended up with.


I love the new profile.  It doesn't dig into my palm anymore.  Even when I mash my palm into it, it won't activate.  It feels no different to press than my factory release, even with a full mag on a closed slide.  Now I just have to keep it from rusting until I get my first slide back from JagerWerks. 


CZ P-10C - HB Industries Theta Flat Trigger #2 - P-10C Trigger Reset Issues and Fix

A few days ago, I received an in-stock notification in my email and purchased a second black trigger from HBI.  When I received it in the mail, I tore into the package and grabbed my FDE P-10C.  Once installed, I noticed two things.

First, the trigger safety was much smoother.  The minor roughness I noticed with my first trigger when pressing the safety blade was gone.  With this new batch of triggers, HBI quietly made a small change, omitting bead blasting inside of the safety notch.  Everything else about the trigger, comfort, crispness, pre-travel reduction, was the same.  It was excellent...until I released the trigger.

The trigger would travel forward about 1mm, then stop.  It wouldn't reset until I took my finger almost off the trigger.  I took both my P-10Cs apart and noticed no dimensional changes in the HBI triggers. I even swapped the older trigger into the FDE and the same thing happened.  Upon closer inspection, I found some alarming gouges and wear on the locking block and trigger bar.  There's no way it was caused with three dry-fire pulls, so it must have happened previously with the stock trigger.  On reset, the trigger bar wasn't dropping far enough to clear the locking block.  Since the factory trigger is plastic, it had enough flex to let the trigger bar power past the block, but not before it left some nasty gouges behind.

I broke out the Dremel tool, and started grinding away the offending material on the locking block.  Before you gasp in horror about the prospect of taking the gun-butchers favorite tool to a firearm, this is apparently a known enough issue to CZ that some models have different locking blocks that are cut exactly where the offending interference occurs.  I started with a large sanding drum, progressing to sanding sponges.  I cleaned up the new radius with a polishing wheel.  Once reassembled, all was well.  Accompanying video below:


Polymer80 PF940C Compact Gen2 80% Not A Glock - Part 1 - Frame Build

Up until recently, I've been mostly Glock-centric.  I've owned other polymer striker-fired handguns, but I've always circled back to the Glock platform.  I've never considered Glocks to be "perfection", and over the years I amassed an assortment of OEM and aftermarket components.   When I finally got around to organizing my parts drawer, I found I only needed 11 parts to build another Glock.  A few internals, slide and frame.  As fate would have it Polymer80 announced a %20 off Labor Day sale with free shipping on their new PF940C 80% frame.  I was not-interested in their original frame because the rear slide rails were simply machined into plastic.  I also wasn't a fan of the grip design.  It didn't seem to offer much improvement over the factory Glock frame aside from deleting the finger grooves.  Also, they sold for double what you could buy a stripped Glock frame for.  Oddly enough, complete Glock frames can be had for around $200, the same as a Polymer80 frame with lower parts kit, and that's before shipping to your FFL and transfer fees..

This new version however intrigued me.  The plastic rear slide rails were replaced with a steel insert.  It also already had all the modifications I do to my Glock frames.  Trigger guard undercut, milled accelerator cuts, finger groove delete, and 360 degree stippling.  It also has a thumb cutout for the mag release.  I actually prefer this arrangement over the Gen4 release.  They also filled in the "thumb divot" near the top of the grip, and straightened out the backstrap.  The only problem was I didn't have a Gen3 slide, and I wasn't going to spend nearly $300 for one.  However, as fate would have it, a smoking deal on a used gen3 G19 slide popped up in my Facebook feed.  I shrugged my shoulders, and after a few clicks, the frame and slide were on their way to my front door.  I also ordered a few required frame internals from Glockstore and slide parts from BigTexOutdoors.


There's something poignant about walking up to your front porch, and seeing a USPS box containing a soon to be firearm under an American flag.  Yes the mail carrier left it on my porch.  Good thing it wasn't a gun...yet.  I opened the box and was initially impressed.  The jig held the frame tightly, and the polymer frame felt, well, like a real gun.  I grabbed my 4th gen G19 and immediately compared the two.  I squeezed the magwell and noticed much less flex with the PF940C.  I also couldn't flex the pic rail/dust cover so "pignose" isn't in the future for this gun.  The rail is also parallel to the slide.  It always bugged me how the Glock rail points my lights up at about a 5 degree angle.  It's not a big deal, especially at handgun distances, but when running my suppressor, it results in slightly more barrel shadow than i feel like there needs to be.  The non-textured areas are slippery, either from the polymer formula, or the mold release agent.  Griping the PF940C was a revelation.  I've always preferred the 4th gen Glock grip to the 3rd gen because of the smaller hump on the rear of the grip, but I preferred how the gen3's upper backstrap fills the web of my shooting hand better.  The solution would be to run a cut-off upper medium backstrap on my gen4, but they never stay in place, so I've done without.  With the PF940C, I get the extra trigger reach and web filling grip, without the hump forcing my front sight skyward.  It's still feels distinctly Glock-like, but for my size L hands the ergonomics are much improved.  The texturing is sharp and moderately aggressive.  It feels like 20 lpi waffle stippling.

"Frame" mounted in Jig

Another improvement for me is the rear of the magwell.  On factory Glocks, I run an Agency magwell.  Not for faster reloads, but to prevent the skin of my palm from bulging under the grip and touching the magazine basepad.  I have to shift my grip, or they wont drop free.  This doesn't happen with the PF940C.  I did have one magazine that wouldn't drop free even when loaded with ammo, my OEM 31 rounder.  My OEM 15+2, and Magpul 21 round mags dropped freely.


Since my slide is still in transit, I wanted to see if i could use one of my gen4 slides.  The picatinny rail groove is too deep to mill away enough material in the dustcover, and there isn't enough metal to remove on the slide either.

Gen4 Slide? Nope.

Milling away the "rails" was somewhat painless.  Really they are just tabs that prevent the slide from being installed.  A Dremel tool, or even a file or sandpaper is enough to remove them.  While Polymer80 recommend just clamping the jig in a vise, I recommend using a clamp or two to hold the top half together.  I used a vertical mill to cut off the rails, and there was enough flex to chatter the part as the frame moved about.  A c-clamp took care of that.  Speaking of milling, the included 9mm HSS endmill is good enough for the job, but I won't be using it to cut anything but plastic.

9mm HSS Endmill - 3mm & 4mm Drill Bits

For the recoil spring tunnel, I used the mill to hog out most of it, then finished with a Dremel tool.  Since there isn't enough room to lay a sanding drum flat, I used a flex-shaft and a conical stone to finish the opening.

Tabs and Tunnel to be removed

The frame holes were easy enough to drill.  Polymer80 recommends using a hand drill and doing one side at a time.  The jigs holes guide the included 3mm and 4mm drill bits pretty well with one caveat.  The locking bock area of my frame was bent slightly inward.  After drilling the holes, when I inserted the front locking block, the trigger pin holes weren't perfectly aligned with the block.  When the block was inserted, it spread apart the frame slightly, changing the angle of the drilled holes.  I installed the block part way, clamped everything back into the jig, and chased the holes with the 4mm bit.  After that, the trigger pin slid right in with minimal resistance.

Ready for Milling and Drilling

The two solid steel pins take more effort to drive into the frame.  I'm used to not needing a hammer with my Glocks, but one is required to get them seated in the PF940C.

Rail Inserts with Pins

While I tried my Overwatch TAC trigger, I decided to stick with a stock (G17) trigger.  The guide rod is stainless simply because I had it already.  The same goes for the threaded barrel and night sights.  The only frame parts I bought were the mag release and spring, take-down spring, and trigger housing.  In total, completing the frame took about as much time as driving to my FFL and waiting for a NICS check.  Assembled, the trigger and slide feel exactly like a factory Glock.  What different is how the gun points.  It no longer points skyward.  The flattening of the backstrap, coupled with the Gen3 grip circumference, means my sights are dead on from the holster.  Speaking of holsters, the only way I can holster this gun is to mount a TLR-1 weapon light and run it in my Armordillo Lux.  The front of the dustcover isn't narrowed like on a standard Glock, and adds about 3/16" of width.


I'm pretty excited about this frame.  The FFL-less nature of this gun gives me a sense of freedom, like driving around in a $200 car, so I'm free to experiment.  Grip chop? Try a new stipple pattern? DIY Cutaway gun? Sims conversion? Dye a white frame pink?  Go nuts.  A new frame is never more than a few days away.  Shooting impressions to follow.

Uncut "frame"

Locking Block and Forward Rail Insert

Locking Block and Forward Rail Insert

Rear Rail Insert

Rear Rail Insert

Saturday, September 2, 2017

CZ P-10C - HB Industries Theta Flat Trigger

I've become a huge fan of the CZ P-10C.  While I won't be getting rid of my Glocks, I won't be buying anymore either.  The gun has been out in the wild for nearly five months now, and while a few problems have been reported, both of mine have been trouble free.  However, one common point of contention is the trigger, specifically, its shape.  The trigger is serrated and comes to a point in the center.  The safety lever also doesn't sit flush with the trigger face.  The gap at the bottom digs into my trigger finger pad under recoil. After a 4-500 round shooting session, it leaves my trigger finger pretty raw.  My finger also sits low, often dragging on the trigger guard.  If you've ever shot a Glock 19 or 26, this is nothing new, nor is it a big deal, but it's a shame that it spoils such an excellent factory trigger.  Recently, HB Industries teased a flat faced trigger design on social media.  I'm already a big fan of HBI.  My Scorpion Evo wears their trigger, charging handle, handguard, mag release, and trigger spring kit.  So when the Theta trigger became available, I purchased one without hesitating.

I received the trigger two days later, the same day I had to drive out of town for work.  Fortunately, installation was quick.  Driving out the trigger pin is laughably easy compared to a Glock or M&P.  Included with the trigger are a 3# and 3.5# striker spring.  They list the stock spring as 4.25#.  Also included is a little white delrin rod.  This thoughtful little piece of plastic, sits behind the striker, making changing the spring less of a chore.  I've been doing it the hard way, hooking the striker leg on a table or piece of wood.  I honestly feel stupid for not thinking of this myself.

I didn't have much time to examine the trigger.  I grabbed 3 boxes of ammo, my pistol bag with magazines, and threw the pistol in my holster before heading out.  I stopped by my local indoor range for a quick session on my way out of town.  I was in such a rush I forgot to bring targets and my ear pro, so I had to make do with range muffs and a B-27 target.  My main goal was just to see if the new trigger alleviated my discomfort with the stock trigger.  After 150 rounds, I didn't notice any real difference in speed or accuracy, but my trigger finger was no worse for wear.

I packed up, and hit the road for my 3 hour drive to SC.  At the hotel, I took a closer look at the Theta.  The first thing that I noticed was that the finish wasn't as smooth as I was expecting.  It wasn't rough, but Apex, Agency, and Overwatch all have slick, shiny anodizing.  The HBI was bead blasted prior to anodizing to give it a matte finish with a texture similar to a chalkboard.  I could hear the trigger safety scraping against the trigger as I pressed it.  This is completely un-noticed when firing, and has zero effect on the break.  In fact, the break felt crisper.  The new shape of the trigger, and the hook at the bottom, results in my finger naturally resting higher on the trigger, right in the center.  It reminds me of the Apex trigger, but narrower.  It doesn't drag on the trigger guard, and de-activation of the trigger safety is consistent.  With the stock trigger, sometimes I wouldn't get the safety pressed in far enough, and it would catch on the frame as I pulled.  I also noticed that I was getting my finger placed more consistently in the sweet spot, right under the pad.  The edges of the trigger are rounded, similar to my Agency, and don't have the hard edge like the Overwatch TAC.  The trigger safety is wider with slightly rounded edges as well.  It doesn't sit perfectly flush with the trigger face when pressed, protruding about the width of a sheet of paper, but it's so close you won't notice it under your finger.

Pulling at the bottom of the trigger, when I measured the trigger weight with my Lyman gauge, the weight was pretty much unchanged at about 4 pounds.  It feels heavier though in practice.  The higher position of my finger means less leverage, so it feels closer to 5.5#, but the break also feels more crisp, due to the reduced movement.  One change in the trigger pull that definitely apparent is the reduction of take-up.  About 1/3 of the take-up is gone.  The trigger at rest, sits about .5mm from even touching the striker safety.  I can see this looking into the slide from the rear.  HBI even released a high speed video of their trigger passing the infamous "Sig" drop test.  No they didn't beat on it with a hammer.

Is it perfect?  It's close.  The matte anodizing is a non-issue.  After dry firing during a few episodes of Rick & Morty, the "rough" areas completely smoothed out.  For my hands (I wear size L Mechanix), the stock trigger reach is a hair shorter than would be perfect for me.  If the trigger face was extended 1mm forward, and the angle of the face was inline with the pivot pin, I'd be in trigger heaven.

These are tiny nitpicks however, which speaks to how good the factory trigger already is.  I just wish I'd bought a second one when I had the chance, because they're already sold out.

***Update***

I bought a second HBI trigger once they were back in stock.  The newer triggers are no longer bead blasted inside the trigger safety notch and are left smooth.  The roughness I initially experienced  is gone.  I also went ahead and measured the trigger pull of the HBI Theta with a variety of springs.  I took the measurements from the bottom of the trigger at the hook.


This was the only way to get any consistency, so the readings are about 1 pound lower than where my finger actually rests.  Readings are an average of 10 pulls, ignoring readings with over +- 4oz of discrepancy.  Also, I have shot over 3,000 rounds since polishing the trigger bar and disconnector contact points.

            CZ Stock: 4lbs 7.8oz
            HBI 3.0#: 3lbs 9.8oz
            HBI 3.5#: 4lbs 5.2oz

        Glock Stock: 4lbs 3.6oz
Wolff Glock 5.0#: 3lbs 11.9oz


Below is a GIF showing the difference in take-up for FDE P-10C Stock trigger vs Black P-10C HBI Theta trigger, from rest to the "wall".
Stock (top) vs HBI (bottom) trigger take-up