Wednesday, May 10, 2017

CZ P-10C - Initial Observations

TL:DR - I like it.

My P-10C Coming Home

The first gun I ever bought was a Gen3 Glock 17 the day I turned 21, though I've never bought into "Glock Perfection".  But despite their 2x4 egronomics, grip angle (yes I know you can train around it), and sloppy trigger, they are still my go to handgun for serious purposes.  I won't fault them for lack of ambi controls since they can still be activated with the left hand with practice, and many other guns don't execute their southpaw controls very well, especially slide stops.  Typically, the left side lever engages a notch on the left side of the slide.  The right side is connected via a pin and there is often some flex.  On my M&P and P320 it was mushy and never felt positive.  On my VP9 and PPQ, they were better, but the VP9 lever was too long and my thumb would prevent slide lock on the last round.  True ambi mag releases haven't been much better.  On my XD and XDS, The right side would protrude out enough to get partially blocked by my middle finger.  Also, the button rotates about 15 degrees as you press it, making it feel awkward.  Also, with the XDs and the PPQ, the thumb abductor muscle of my support hand would often depress the mag release when I got a strong two-hand grip.  Nothing is quite as embarrassing as having to call in the range master to retrieve your mag that bounced past the firing line.  Then there's the size.  My G19 is the perfect size for pretty much any situation I'm likely to carry it.  The barrel length is just long enough to run a high lumen weapon light but I can conceal the grip under a t-shirt.  Both the VP9 and PPQ are longer in the grip with chunkier slides, while the P320 has a sky-high bore axis and comparably massive slide.  I seriously wonder why the P320 isn't offered in .460 Roland.  The M&P isn't available in a size between the 12 round compact and 17 round full-size and both of mine required $120 in Apex parts to make the trigger acceptable.  Speaking of triggers, pretty much every striker fired trigger was better than the Glock out of the box with the exception of the M&Ps.  My favorite was the PPQ, yet every striker fired gun that I've owned was sold for then next one that was suppose to deliver on the promise of improving on Glocks "perfection".

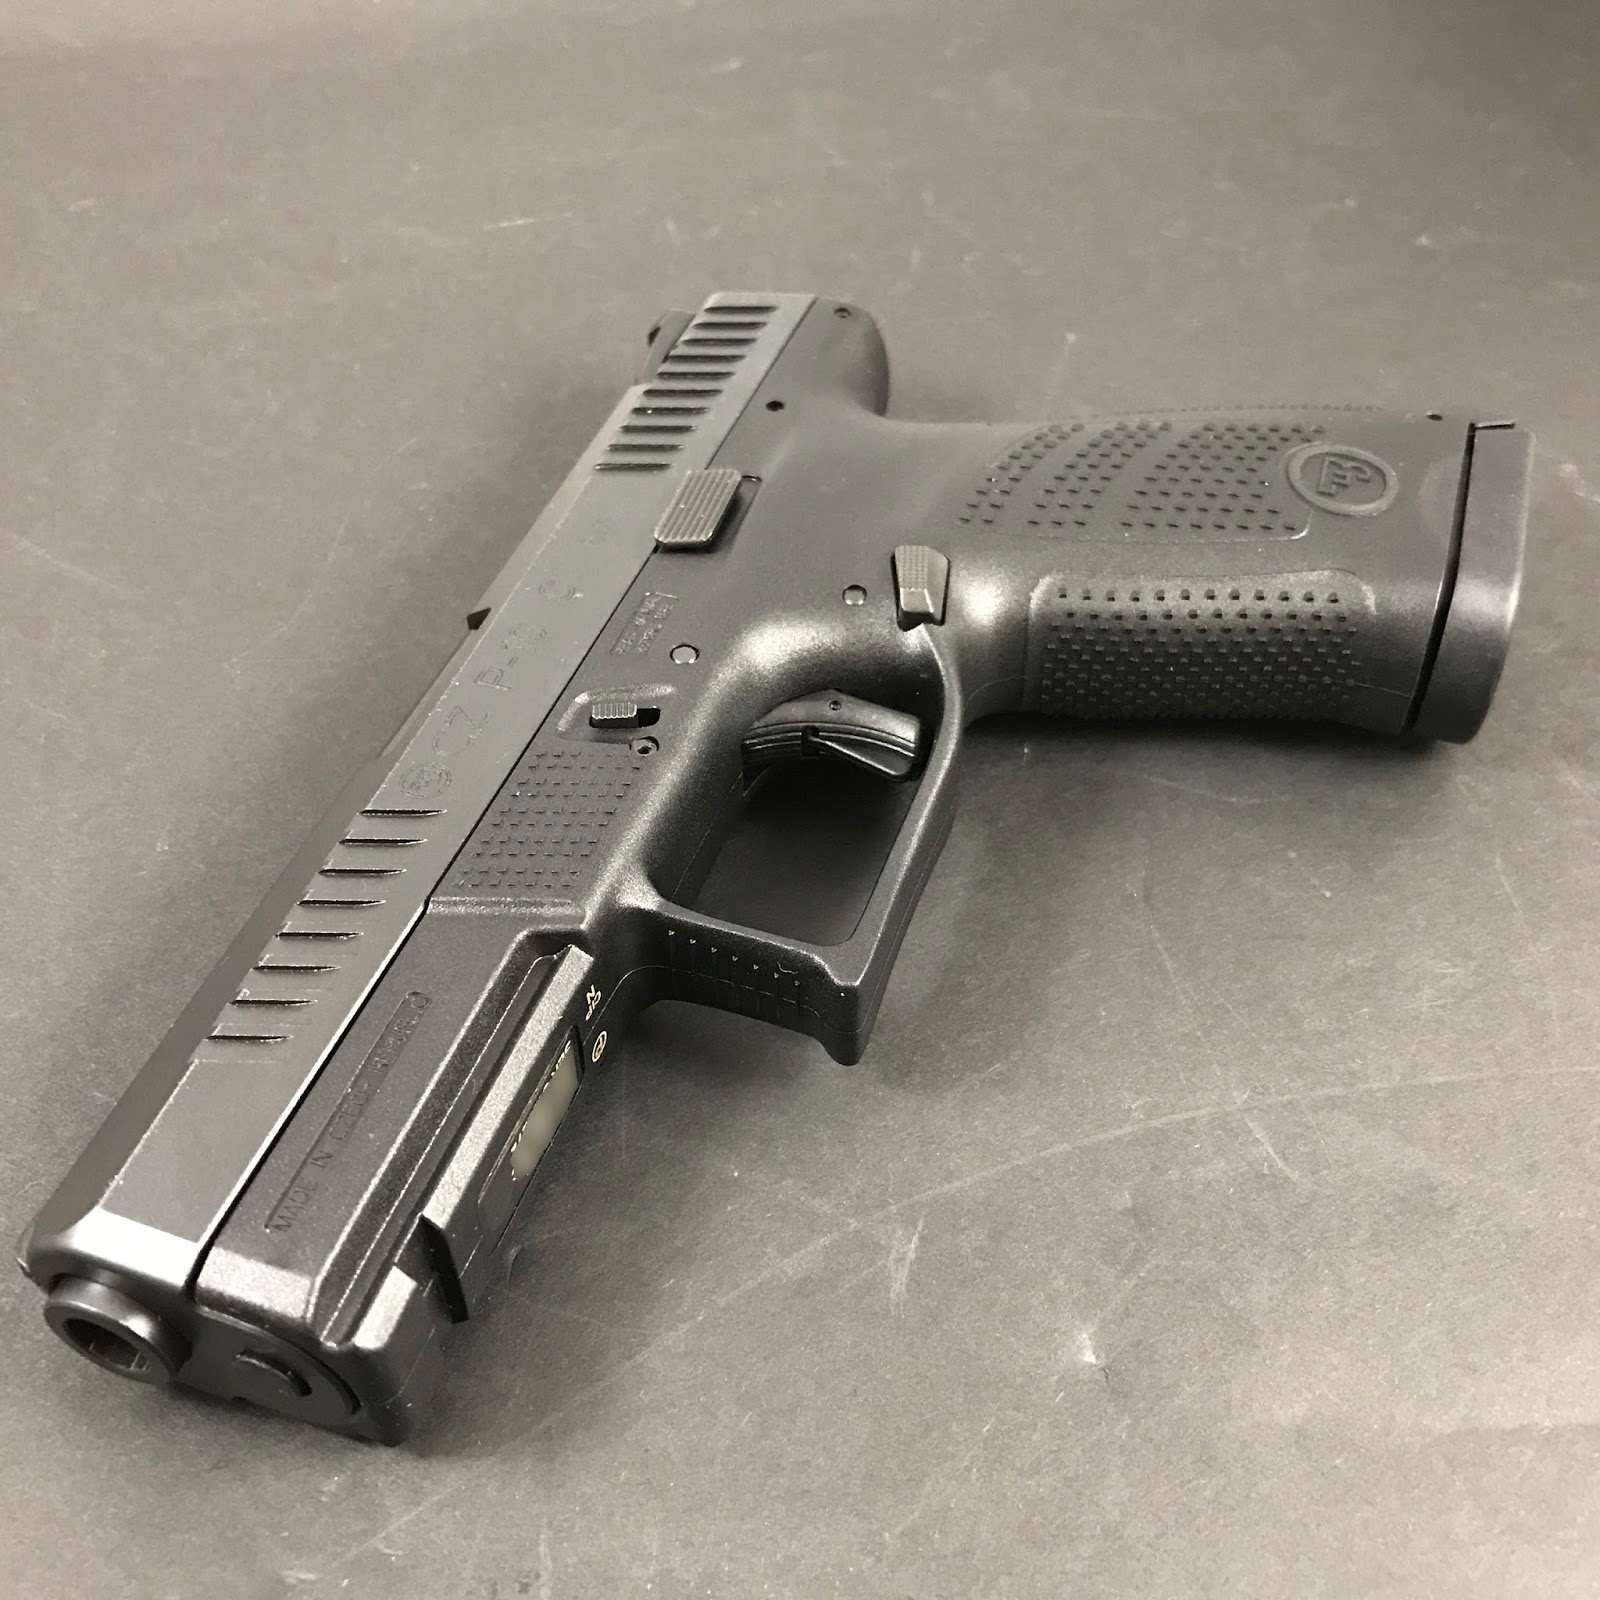
So when CZ-USA announced the P-10C last year I wasn't particularly enthralled.  Don't get me wrong, I'm a big fan of CZ.  I have an SBR'd Scorpion Evo that I love as a range toy, but I've never considered their slide-in-frame design a positive feature and I'm not a fan of DA/SA handguns.  Like every other new striker-fired polymer handgun, the "Glock Killer" hype from CZ fanboys was incessant.  Still, upon further research it looked good on paper.  A Glock 19 with a CZ grip and PPQ-like trigger sounds pretty close perfection to me. In the days following SHOT and NRAAM, I found myself checking CZ's Instagram and Facebook pages for updates on the P-10Cs release.  I re-watched Youtube reviews and started calling gun stores in my area.  A friend of mine informed me that 2-3 had arrived.  I gave them my credit card number over the phone and secured it for $550 after tax and transfer fee.  I picked it up this morning along with a third magazine and have been fondling it ever since.  While I don't have any live rounds through it, I'm very impressed.  Here are my observations compared to my Gen 4 Glock 19 so far.

The pistol arrives in a black CZ marked box with gold colored plastic latches.  Nothing to write home about.  It works.  Inside are the usual safety pamphlets, manual, test target, two magazines, two backstraps, cleaning rod and brush, and the ubiquitous cable lock.
P-10C Case

Nothing Fancy

For hand size reference, I wear size L Mechanix and PIG gloves.

First the negatives.  It's 2 ounces heavier than the Glock.  The bottom of the backstrap is flush with the magazine, so there is a technically a little more grip material to print.  It's slightly larger in every dimension except the grip circumference, and the bore axis is slightly higher.  The mag and slide releases are a little stiff.  The extractor uses a traditional roll pin through the top of the slide, unlike Glock's easy to remove plunger system.

As far as the similarities, they both have the exact same take-down procedure and hold 15 rounds of 9mm.

In nearly every other metric I like the CZ more.  While the magazine button requires a little more effort, it doesn't have a "sweet spot" you have to hit like the factory gen4 Glock.  My first draw of the day with my G19 tends to point slightly high, while the P320 pointed low.  While I can adjust for that, no such adjustment is needed on the P-10.  The front and back straps are aggressive on the P-10C, almost as cheese grater-like as my FNX-45, and no finger grooves.  Finger grooves actually don't bother me on the Glock, but for some it's a hot button.  The grip shape feels like an M&P with narrower palm swells.  My hands prefer the medium backstrap.  Like my Glocks, I plan to sand off the factory grip texture and apply a carry friendly stipple, but I'll wait until I have a few hundred rounds down the pipe first.  The grip tang is wide and flatter than the Glock, but still narrow enough that I don't feel the corner dig into my thumb knuckle.
P-10C - Frontstrap

P-10C - Backstrap

P-10C - Aggressive Texture

As far as holster compatibility, there really isn't.  Sure it'll fit the same leather or universal molded models as the Glock, but it won't "click" into place on my kydex G-Code or Guncraft holsters.  With a light however, it will work with my TLR-1 HL and X300U Glock holsters since they use the light for retention.

The CZ does take a few departures from the Glock.  The barrel lockup areas are huge and features traditional land and groove rifling.  I don't consider it better or worse than polygonal rifling.  What I do like is the striker safety system which is integral to the striker assembly.  Instead of pressing a plunger up into the slide, the trigger bar moves it to the side.  Unlike the plunger system, the spring can't get kinked and debris is less likely to jam up the plunger.  There is a weep hole in the slide to allow water to drain from the striker channel.  Also, it's much easier to make a rotating part smoother than a sliding part.  This is evident in the take-up of the trigger.  It's smooth up until the last millimeter of grit before the wall.
P-10C - Barrel

P-10C - Striker Safety

P-10C - Striker & Safety Assembly

Let's talk about the trigger.  My Glock has seen a ton of triggers.  Apex, Agency, Overwatch Tac, Skimmer, and nearly every connector made by Ghost.  The best combo of parts I've found for a 4# trigger with minimal take-up, over-travel, and maintaining all safeties is an Agency trigger shoe on a Haley Skimmer trigger bar, with a Ghost Evo Elite 3.5 connector fitted for over-travel, and Apex Ultimate Striker Block and spring.  The P-10C absolutely kills it.  I measured the take-up to around 2lbs, 11oz.  The break is crisp averaging 5lbs, 1oz. On the whole, it's like a PPQ.  The break is slightly cleaner than my VP9.  There is some creep but I really have to concentrate on a slow pull to make it hitch once before the break.  I've dryfired it about 500 times and it's smoothed out a little bit.  It may not impress a dyed in the wool trigger snob, but for a striker-fired handgun it's tops.  The reset is as short as my Agency triggered G19.  Unlike the M&P, it gives your finger more of a shove forward like on the Glock.  You don't have to put any effort into resetting the trigger.  Just relax your booger hook and the trigger pops forward to the reset point.  Over-travel is minimal, similar to a budget 1911.  The shape is different than in the photos I've seen before.  It's less flat and has serrations like the G19/26, probably there to satisfy some dumb import law, where serrated triggers are considered features of  target guns which make them legal for sale in the US.  The trigger face comes to a point at the trigger safety "dingus", making the trigger feel heavier than it is.  I hope Apex, CZ Custom, or Cajun Gun Works can come out with a flat replacement.  As it is, the trigger has just enough curve to get consistent finger placement and the reach is perfect for my hands.  I don't feel my trigger finger drag the bottom of the trigger guard.  The break point is also a little further forward in the trigger guard which is amply sized so the tip of my trigger finger doesn't catch the front of the trigger guard like on my Glock.  As far as trigger weight, up to the wall it feels like 3 pounds, jumping to 6 pounds for the break.  I will measure it properly with my digital scale soon.  Unlike other striker-fired guns, the P-10C mimics the Glock safe "double" action.  The striker is only pre-cocked about halfway before the trigger is pulled.  On the VP9, PPQ, M&P, XD, and P320, the striker is fully cocked, held in place by the sear and ready to fly like a mousetrap.  On the P-10, you can watch the trigger bar move straight back about 3/16" before it starts to drop down into the frame, exactly like on the Glock.  I'm glad I got mine now because I wouldn't be surprised if CZ finds a lawsuit on their hands.  Remember in the 90's when Glock sued S&W for the abominable Sigma?
P-10C - Trigger Face

P-10C - "Dingus"

P-10C - Trigger Bar Movement

The mag release can be activated from both sides.  Unlike the XD, it slides in and out with no rotation.  It acts on a lever that pulls the top of the release away from the magazine notch.  I can hit it without shifting my grip, but it's easier to press if I roll the gun slightly inboard.  It's the same technique I honed with my Glock 19, but the button has a more positive "pop".  This is probably due to the metal release disengaging a metal magazine.  It's just cleaner and less mushy than plastic on plastic.  To my relief, pressing in the mag release doesn't press the opposite side button against my middle finger.  On my G19 and G26, sometimes the meat of my palm will touch the magazine pad/extension.  This is often enough pressure to keep the mag from dropping free at slide lock.  I alleviated this on the G19 by adding an Agency magwell, but it makes stripping a mag harder during double feed drills.  The longer backstrap on the P-10C clears my palm and the mags fly from the magwell.  The lanyard hole gives me a spot to use my thumb to grab the back of the magazine.  The scallops in the grip do allow for a small amount of grip on the sides of the magazine, but I prefer the front to back method.
P-10C - Magwell

The slide release is stiff.  Instead of being u-shaped, it's a hoop circling the entire magwell.  The rear of the hoop catches the bottom of the slides breachface.  The upside is that there is no flex in the release from either side.  The only part that isn't mirrored is the tab that engages the follower.  The downside is that the catch point is behind the release lever instead of above or in front like most handguns.  With less leverage, it takes a deliberate push to drop the slide.  This may be an issue if you have smaller hands or a weak thumb.  Not an issue if you prefer to go over the top of the slide.
P-10C - Slide Release

P-10C - Slide Release

Segwaying into slide operation.  The top corners of the slide are chamfered, tapering deeper as they head toward the muzzle.  The front and rear serrations stop at the chamfer, so there's less traction as you move up the slide.  I'd like to see the serrations continue all the way up the chamfer to the top of the slide, but that would add cost, though I'd be willing to pay it.  The pistol arrived covered in oil and the slide slipped once on me while I was messing with it at the gun counter.  Racking effort is lighter than the VP9 or Glock 19.  One thing I like is how the serrations stop about 1/8" from the bottom of the slide.  Coupled with the wide tang, even if you have meaty hands, you shouldn't ever get bitten by the slide serrations.  Also of note, the guide rod is polymer.  While I'll never melt it by doing a 1,000 round torture test, I won't be surprised if a steel replacement pops up shortly in the aftermarket.  The extractor also serves as a loaded chamber indicator.


The metal luminescent (glow in the dark) 3-dot iron sights are acceptable but not optimal.  The rear faces aren't serrated, so I notice some glare off both the front and rear.  I prefer black rears and a fiber front.  I need to order a P-07 front from Dawson precision.  Until someone makes a P-10/Shadow duty style rear sight, I'll black out the dots with a Sharpie.  The rear sights are shaped with a ledge to hook on your belt/holster/shoe/etc, but they are still pretty small.  I wouldn't mind seeing these enlarged a tiny bit.  The front sight measures a standard.125" wide, while the rear notch is .115" wide.

A note on light compatibility.  My TLR-1 and TLR-1HL both fit just fine with either the Glock or 1913 Picatinny key.  With my X300U-B, it only fit with the Glock key.  My X300U-A would barely slide on the rail, the same problem I have with it on any other picatinny rail until I loosened the mounting screws.  The dustcover feels more substantial than the Glock, so I'm not concerned with over-tightening the TLRs or X300U-B.
X300U-B w/ Glock Key
TLR1-HL w/ Glock Key
TLR1 w/ 1913 Key


My future plans were to get the slide milled for an RMR but my recent Sage vehicle defense class has me re-thinking that.  I love red dots on handguns, but wiping mud off of the emitter and the fogged up glass as well as struggling to find the dot in unorthodox shooting positions made me appreciate just running irons.  I plan to bring the P-10 to a few IDPA matches, a pistol course this month with Chris Cerino, and the next Sage Dynamics handgun class I can.

More photos...


Disconnector


P-10C - Test Target


Friday, May 5, 2017

Sage Dynamics Vehicle Defense 2-Day AAR

"If you drive a panel van for work, get a new job." - Aaron Cowan

Nine months ago I took a two day defensive handgun class from Aaron Cowan at Sage Dynamics.  I walked away from that experience humbled and with a new outlook on firearms training.  I unconsciously approached that class with a "gun-tainment" mindset.  Coming from shooting exclusively at indoor ranges,  I was so excited to be able to shoot at multiple targets at speed, "temple index", and generally run around and do "cool ninja s**t".  I failed to seriously apply the techniques we were instructed.  "Hello, my name is Earl, and I am a ballistic masterbater."

After that I took defensive shooting more seriously.  I tripled my range and dryfire practice, and started hitting the gym.  I also decided that I needed training for events that were more likely to occur and to work my way up to more exotic classes like night vision and such.  One class that popped up was Sage Dynamic's Vehicle Defense.  Most of us spend a lot of time in and around cars.  It only makes sense to get some training involving one of the most common objects we all encounter on a daily basis.

Day 1: ~500 rounds

 The forecast was hot and sunny on day one, and called for rain on day two.  I came much better prepared this time around.  I brought a larger cooler, stocked with an entire case of water, Gatorade, food, and snacks.  I bought two trauma kits and a basic first-aid kit due to glass and sharp metal concerns.  1000 rounds of ammo, 200 rounds of defensive ammo, extra mag pouches, holsters, and two guns, an RMR'd Glock26 and an iron-sighted Glock19.  I chose to run my G19 without an RMR for two reasons.  First, I wanted the practice with irons, and after breaking my glasses a week earlier, I realized that I couldn't rely on the RMR if my glasses were knocked off in a fight.  Second, while I'm proficient with my RMR'd Glocks on the range, in training and real-life, I'll probably find myself in an awkward position, where my shoulders aren't square to the target with a perfect two-hand grip.  In those cases, I have trouble finding the dot and end up looking for the front iron sight.

The class arrived on the first day at around 8:00 am.  I was surprised by the number of students.  There were about 20 of us, from all walks of life.  Two SWAT officers, former/active military, and even a group of guys having their bachelor party/weekend.  Aaron gathered the class and did his safety/medical briefing after which we positioned the cars and began the ballistic lesson.  The vehicles used for the class were a fullsize panel van, minivan, and midsize sedan.  The vans were provided by a Sage alumni.  Students were instructed to load their guns with their preferred defensive ammo.  Each student would then be told to shoot 5 rounds into different areas of the vehicle body.  After each student, we would gather around the vehicle and look for rounds penetrating and/or deflecting into and/or through the body/glass.  9mm, .40, .45, 5.56, .308, 7.62x39, and 12 gauge slugs/00 buckshot were used on all three vehicle types. This portion of the class was the most eye opening.  I assumed that handgun and 5.56 rounds would easily pass through both sides of a car when shot through the doors.  Only a few handgun and some of the 5.56 rounds made it out the opposite door unless they deflected through the window.  308 and AK rounds on the other hand passed through, though often they keyholed on exit.

We then broke into pairs, and shot five rounds through the windshields from the front seats.  We were instructed to not change our point of aim on the target to observe how our first few rounds deflect.  With the targets about 10 feet away, my first two Ranger 147gr rounds deflected about 3" from POA.  The subsequent shots were on target.  It highlighted the importance of fighting the urge to move to a clear portion of the windshield.  By shooting through the "milk" and burning a hole through the glass, accurate hits can be made through laminated glass.  Obviously, if the target moves, you have to track it, but the point was made.  After every student had done a run in each vehicle, Aaron moved onto the next lesson.  This was the pulse of the class.  10-20 minutes of instruction followed by shooting.  We were instructed on dealing with seatbelts, doors, glass, exiting, moving, and fighting in and around the vehicle.  We used the knowledge we picked up during the ballistics portion, to position as much cover between us and the threat.  Stacking the A pillar and C pillar between yourself and the threat can provide temporary but not insignificant cover.  Each lesson built on the previous one.  We learned the importance of proper metering off the vehicle, and why it's not optimal to suck up to the car and get as close as possible to the body.  Drills included engaging threats in front of and to the sides of the vehicle, then exiting and finding positions of cover or advantage.  We then moved on to scenarios.  In all scenarios, the assumption was that you couldn't simply drive away, or just run over the threat.  After each drill or scenario, each student marked their hits on the targets.  We were all held accountable for our accuracy.

The last segment of the the day involved defense of a third party.  As both the driver and passenger, we rotated through each vehicle with no-shoots playing the part of the wife/friend/child etc.  We learned how to safely draw and maneuver our firearm inside the cabin.  After running the drills solo, we paired up and did each drill again.  I noticed the level of concentration in the class ratchet up during this portion.  With a live person next to me, I fired fewer rounds, focusing harder on my accuracy and muzzle awareness.  I burned through almost three magazines with a cardboard goodguy, but with a live partner, I only needed a single reload.  That was my ah-ha moment for the day.  I was heading down the road of gun-tainment.  We ran the drills in the panel van and the sedan since the minivan didn't have a passenger seat, engaging threats while guiding the third party to a position of cover.

We finished the day with a funeral for the panel van.  We all hated the van.  Its size and lack of windows meant it presented us with few options to engage threats, and we also knew that most of the large body was thin sheet metal, offering very little ballistic protection.  We lined up and fired our duty/carry handguns, rifles, and shotguns into the van.  Most of the rounds penetrated out the other side.  Observing the problems the van was causing, Aaron quipped, "If you drive a panel van for work, get a new job."

Back at the hotel, I downloaded my GoPro video and watched my runs.  I noticed a lot of mistakes, though in many cases I self corrected during the run.  I would punch my gun through a window opening where glass would still be, meter way to close to the car, or punch my gun out over the hood or trunk.  After a shot or two, I'd back up, correcting my mistake.  I also noticed that I would shoot faster after a slide-lock reload, as if to compensate for the lull in gunfire.  I then spent an hour practicing my dry-fire and reloads until meeting up with a few of the students at the only nearby chain restaurant.  We talked jobs, guns, families, cars, politics, and the class before heading back.

One takeaway I had was how I didn't feel disadvantaged without my RMR.  Contorting around the vehicle cabins, and often shooting one handed, I was picking up my irons much more quickly than I would have my RMR dot, and getting good hits.  It also reinforced my belief that Aaron is a great teacher.  Some students shot no-shoot targets.  He didn't have to call anyone out or make a big show of it since everyone already knew it.  After one of my runs, he told me that I had strayed too far from the car to get a shot on my threat, and exposed myself to the second threat.  Instead of using it as a teaching moment for the entire class, he addressed me individually.  It was the same when a student violated a safety rule.  He made no attempt to hide it from the class to spare the students feelings, but simply addressed the issue with him and moved on.  It shows a level of respect for us as students, and a stark contrast from the instructors who treat classes more like reality TV.


Day 2:  ~350 rounds

I wish I'd brought my EZ Up.  The forecast had changed from light rain in the late afternoon, to heavy rain all day after lunch.  We removed all the glass from the cars and hammered down any metal protrusions as best we could.  We started the day with a practical quiz of the previous day.  The student started in the sedan and would engage targets around both vans at a simulated intersection.  We ran the drill solo.  Even though the threats and no-shoots were in the same position for each student, we often approached the drill differently.  I advanced toward the last van, while some students stayed behind the sedan.  Neither strategy is wrong.  If you have small kids strapped into car seats, you need to move the fight away from them as soon as possible while being as violent as possible.  If alone, stacking the car between yourself and the threats and looking for an escape route might be a smarter option.  Students could also retrieve a long gun from the trunk if they chose to.

We used 3D targets complete with cardboard arms that portrayed an empty hand, knife, or gun.  We then moved the cars into an ambush or road rage incident position.  The student started in the sedan with the panel van next to the driver side and the minivan blocking both cars at a 90 degree angle.  We ran the drill in pairs, with both students armed.  The key to the drill was simple communication.  No code words or abbreviations.  "Move to the back" "Okay move" "reloading" "Come back to me"  Simple and clear communication was critical especially around the van.  With limited sight lines, it was entirely possible for two students to end up on opposite sides shooting at a threat between them.  Fortunately, no safety violations occurred.

The scenarios started with students in the car with cardboard covering the windshield while everyone else moved the threat and no-shoot targets around.  There was no way to "game" the scenario.  When the cardboard was lifted, I saw a threat target standing directly in front of me.  I completely tunnel visioned on the threat as I drew my gun and failed to clear my backdrop, but a split second before I fired, I saw the minivan behind it.  I shifted my aim from the chest to the head to clear the van.  Two of my rounds impacted the roof of the van.  Directly behind the threat target, a student had positioned a no-shoot in the minivan.  We exited the vehicle and maneuvered around as a pair, engaged all the threats with zero hits on no-shoots, and checked our accuracy.  Then the rain came...hard.

We covered the targets with blue plastic trashbags, which meant checking for accuracy would prove difficult.  Other than that, we rolled on.  We ran more drills either solo or in pairs.  The last drill was a turkey shoot.  We would engage all targets from behind the panel van or sedan.  Aaron would call out positions to fight from.  Either over, through, or under the cars.  The rain stripped our guns of lube, and mixed with the Georgia clay, forming an unholy paste that gummed up a few guns, including a Glock.  Magazines that were buried in the mud were hastily rinsed off in muddy puddles and reloaded.  My G19 was feeling quite gritty but it ran just fine, until the front sight came loose.  Despite the sight flopping left to right, I fought through the drill, cursing myself for using blue instead of red loctite.  I finished the day with my RMR'd G26.  Despite the rain and mud, I was surprised at how I could still get hits with a fuzzy dot through a foggy lens.

By 4:00pm a creek had formed and there was no way were were going to be able to move the vehicles.  Aaron gathered the class and we headed into the barn for debrief.  I was cold, soaked, muddy, and tired.  Yet I had spent the day shooting so I was happier than a pig in s**t.  After the debrief came the infamous Sage patches.  Some students demonstrate excellent application of the skills learned in class and show up with solid shooting skills.  Aaron recognizes these students with a red pvc Sage patch.  One student received the coveted black patch for the top student.  I was one of six students to receive a red patch.


High fives and handshakes went around as the class broke up and headed out.  At home, I reviewed my GoPro footage and reflected on the past 48 hours.  I felt so much better this time around.  I learned a ton of new info.  I learned that I didn't have to feel out gunned without an RMR.  I can CCW a G19 with a weapon light.  My carry ammo does pretty well against vehicle bodies and glass.  Gym time is just as important as range time.

If I could do anything different, I would improve my first-aid kit.  Two students lacerated their thumbs but all I had were band-aids, gauze, and tape.  Some dermabond or steri-strips would have been handy.  Also, Red loctite on my front sight and an EZ Up.


Wednesday, April 5, 2017

Apex, Agency, and Overwatch Precision Tac Triggers

Here are some quick observations  on the Agency Arms, Apex, and Overwatch Precision TAC triggers for Glock handguns.  In this test I used my Gen4 Glock 19.  All springs are stock.  All triggers were used with an OEM "minus" connector.  All triggers came with a Gen3 trigger bar.  I measured the trigger pull weights with a Lyman Digital Trigger Pull Gauge.  Below are the averages of 10 pulls.  Due to the flat profile of each trigger, it was impossible to consistently pull from the center of the trigger.  I pulled the triggers parallel to the slide from the "hook" at the bottom of each trigger.  Since this is at a point lower than where your finger would actually rest, the readings are about 10oz lighter than you would actually feel.  For reference, I measured my HK VP9 at 4 lbs 14oz.

Apex - 4 lbs 0.3 oz

Agency - 4 lbs 4.7 oz

Overwatch Precision Tac - 4 lbs 4.1 oz

Next I measured total trigger pull distance.  I've seen people try to measure take-up and reset but short of a Dvorak TriggerScan, there's really no way to accurately measure every stage of a trigger pull.  The Apex was installed in my G19 Gen4 training gun, the Agency in my EDC G26 Gen4, and the Tac in my EDC G19 Gen4.  All have Ghost 3.5 Evo connectors, Vickers Mag Releases, and Vickers Slide Stops.  All other internal parts are stock.  The Ghost connectors have fitted over-travel stops so each of these represents the shortest distance I could achieve without sacrificing reliable ignition.

G19 - Apex - ~9.5mm

G26 - Agency Arms - ~5.5 mm

G19 - Overwatch Precision Tac - ~6.5 mm

Each trigger has it's stengths and drawbacks.  The Apex uses mechanical advantage to reduce pull weight, but has 30-40% more travel than the Agency and Tac.  It also has the longest trigger reach.  I wear size L Mechanix and have no problem reaching the Apex trigger, but smaller handed individuals may want to look else where.

The Agency feels the most comfortable.  The edges of the trigger are more rounded and the "hook" at the bottom is more pronounced.  This raises your trigger finger slightly higher than the Apex or Tac.  The Agency also has the shortest trigger reach.

The Overwatch Precision Tac trigger is the smoothest.  The trigger bar is polished and NP3 coated resulting in a buttery smooth pull.  The less pronounced trigger "hook" meant I noticed my finger dragging on the trigger guard and the edges of the trigger are almost square.

All three trigger passed a "drop safety" test.  I used a cut-down slide plate from Ghost Inc and tried to press the trigger bar down with a 1/16'" punch to release the striker.  Neither of these triggers allowed the cruciform to move down in the trigger housing unless the trigger was pulled.

I have the most trigger time behind the Apex, followed by the Agency and the Tac.  I always liked long triggers on my 1911's and preferred longer trigger reaches on my double stack guns and rifles.  However, my trigger techniques has evolved to use the "inch worm" method and I now gravitate toward shorter triggers.  While the Agency and Tac are extremely close, I have to give the nod to the Agency.  All three are great for shooting one hole groups but at speed, the Agency is the easiest for me to shoot.  The trigger itself just feels nicer and the short pull and reset offset the slightly heavier weight.  

-Carry On