Friday, November 25, 2016

American Defense Mfg. UIC Lower Receiver - Initial Impressions

Up until a few years ago, I didn't put much of a priority on whether my guns suited 10% of the population.  Fast forward to today where I have a 3-year old son who is left handed.  His handedness is beside the point however.  With the arrival of my daughter last spring, I began to take self-defense with a firearm much more seriously.  This year I increased my total number of formal training classes from one to four, and I'm registered for two more plus a medical class next year.  I've realized that being able to run my guns left handed was not a luxury, but a necessity.  My right hand is likely to be occupied, holding a phone, my kid, groceries, keys, etc.  And cover isn't always going to be to open to my right.  Fighting with a rifle in a home defense or suburban setting requires often shooting from austere positions.  Shooting from the right shoulder might not be possible when contorting for cover behind a vehicle tire or fire hydrant.  So now, 25% of my ammunition is spent left handed with both the pistol and rifle.  My current defensive AR is an SBR with an ambidextrous Aero Precision lower.  Charging handle, safety, mag release, and the PDQ bolt catch/release are accessible left handed.  One issue I have is with the design of the bolt catch.  It's a single piece of steel, heavier than the standard one, and the ejection port door presses down slightly on in.  Both these factors resulted in the bolt not always locking on the last round.  Only after re-profiling the bolt catch and unwinding the port door spring a bit was the issue resolved.

Modified PDQ Bolt Catch

Unfortunately the lever still sticks out away from the receiver and often the bolt will close when I set the gun down on its right side and the port door presses it down.  I also have an annoying issue with the ergonomics when shooting right handed, specifically when locking the bolt to the rear.  A bonus of this bolt catch is using your right hand trigger finger to lock and release the bolt.  However, it's too high to reach without taking my middle finger off the grip.  Despite these shortcomings I haven't found a better option, including the Magpul BAD lever.  Until now.

Yesterday I received the UIC lower receiver from American Defense Manufacturing.  You probably know ADM for their awesome QD optics mounts and they've applied their engineering and machining knowledge to the UIC (Universal Improved Carbine) receiver.  While I've heard grumblings about some milled receivers not being as durable as forged, 7075 aluminum is plenty tough since most of the stress is in the upper receiver.  Even if you plan to hold the rifle by the barrel and swing the stock into a tree, I believe this receiver would fare equally as well as a forged mil-spec.  It arrived with the front takedown pin and bolt catches installed.  The rear takedown pin, detent, and spring are included.  The takedown pins are dimpled to prevent a tool or bullet from slipping and marring the beautiful anodized finish if one is needed to press them out.  The ADM logo is subdued but I would prefer it if the selector markings were a little more pronounced.  While the milled  pockets on the the magwell look cool, I have a long trust name, so I'll need to find another location for my NFA engaving should I choose to SBR it.

ADM UIC - Right

ADM UIC - Left
ADM UIC - Out of the box


The first thing you'll notice on the UIC is the right side bolt release.  It moves up and down, pivoting on a roll pin in the upper fenced portion of the receiver.  It lays flat against the side.  Overtime, it will probably leave a curved mark like the selector of an AK.  The left-side bolt catch has an extension that rests in a groove in the right-side catch.  Both pieces are loosely linked together but there is no rattling as both parts provide sufficient tension whether engaged or at rest.

Ambi Bolt Catch - Down

Ambi Bolt Catch - Up

Ambi Bolt Catch - Down


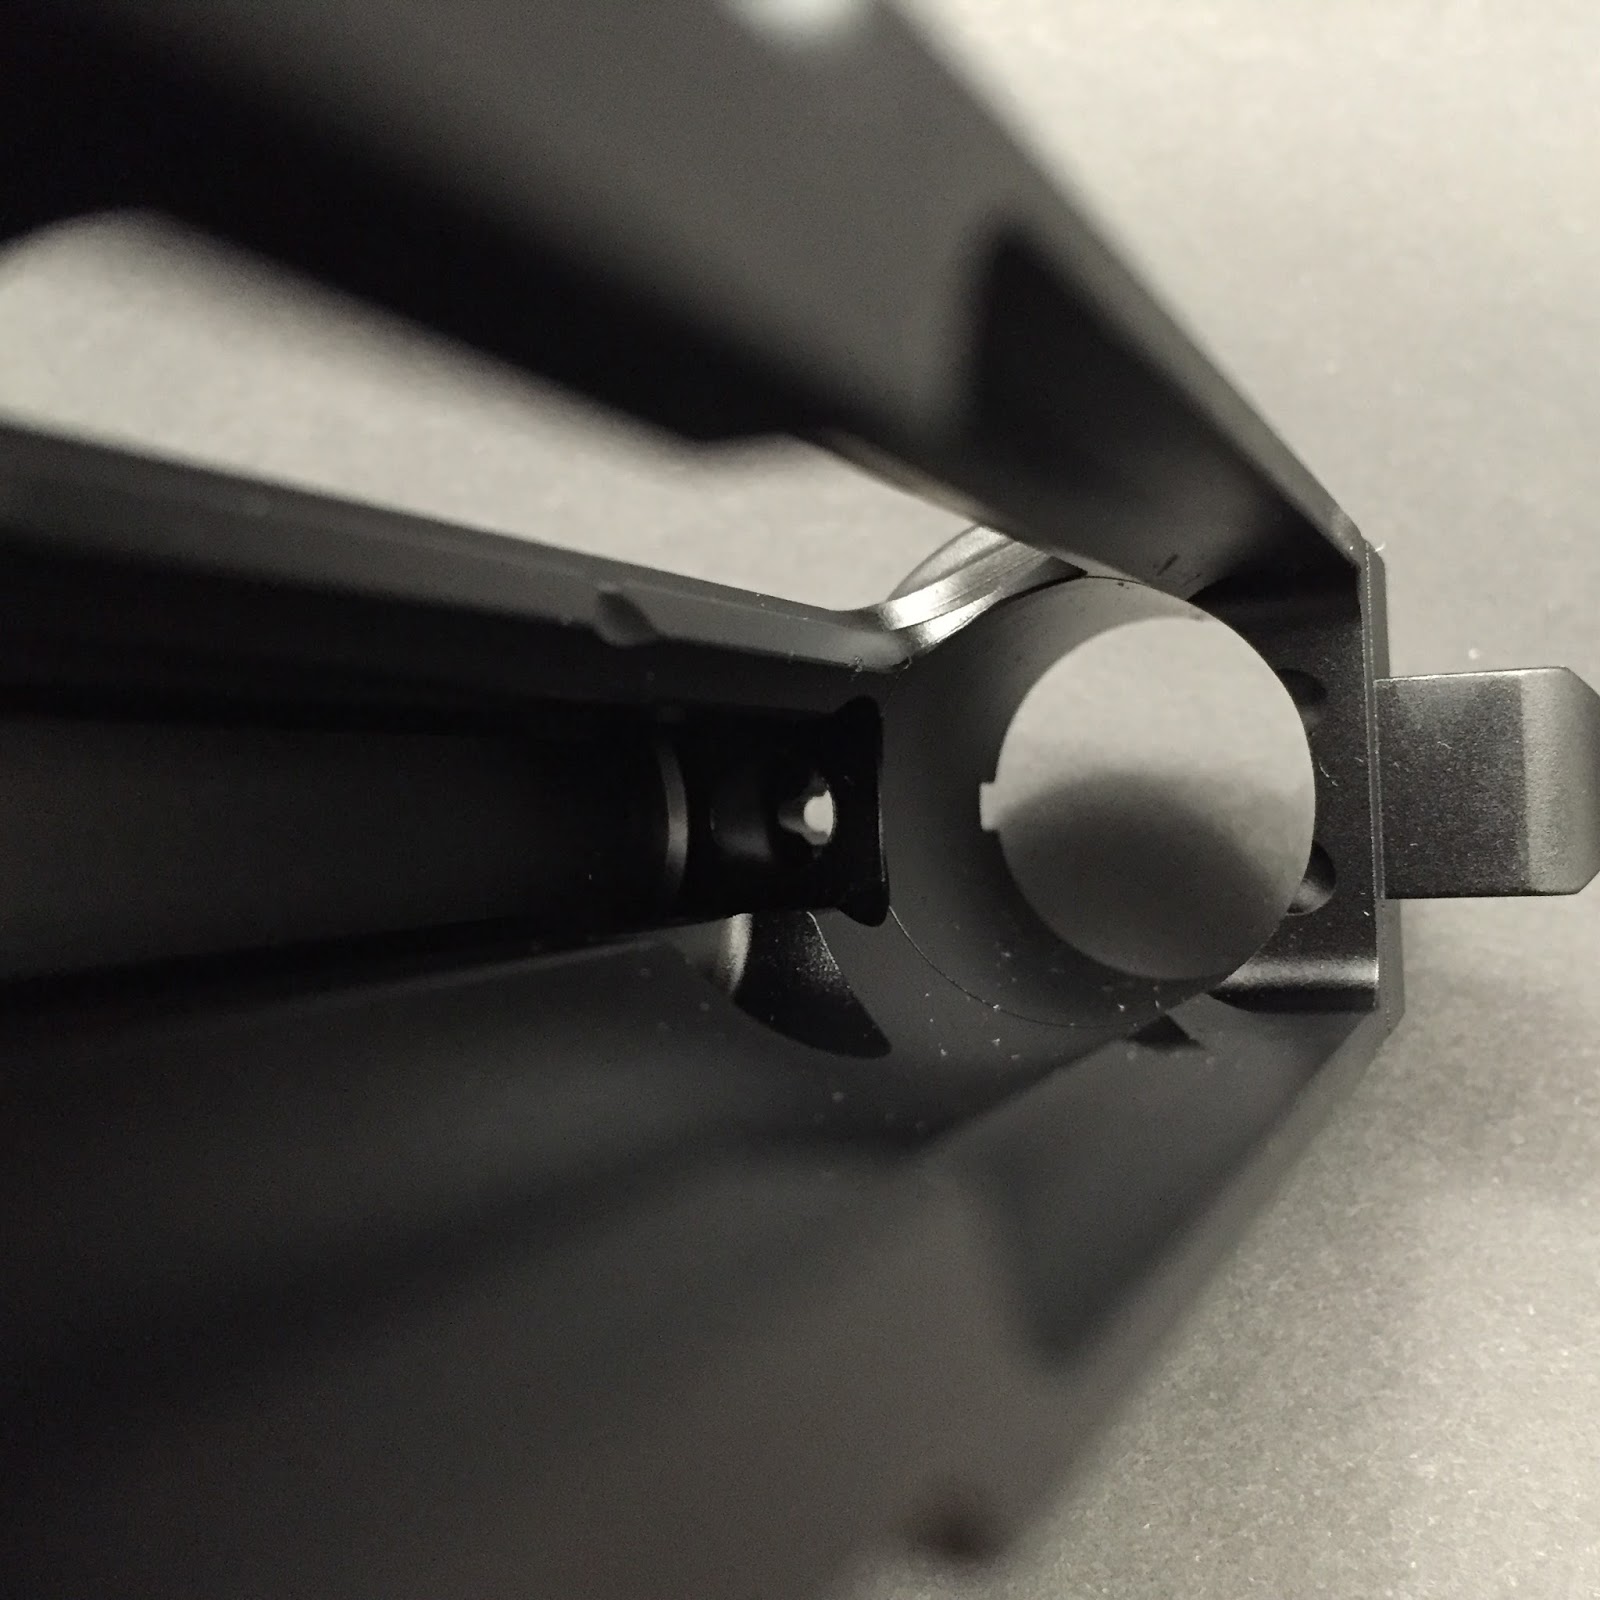
Both magazine release buttons are nicely protected by tapered shelves.  This is a necessity on the left side because the button is 1/2" closer to your trigger finger when it's resting on the frame.  It pivots on a roll pin inserted through the shelf.  The left side bolt release paddle is over-sized, with a dedicated portion for locking the bolt rearward.

Over-sized Bolt Release & Left Side Mag Release

The trigger guard is enlarged for gloved fingers and integrated into the lower.  Mine was a blem or "Duty" lower.  The blemish was that the logo was engraved slightly off center on the trigger guard.  Totally worth the $10 discount, plus it was in-stock.  There is also a nylon tipped allen screw behind the grip screw hole.  It can be raised to provide just enough tension to eliminate any annoying wobble between the upper and lower receivers.  A nice touch.
Trigger Guard & Tensioning Screw

Upper Receiver Tensioning Screw

The front of the magwell has eight grooves machined into it for a secure magwell grip if you're so inclined.  The magwell itself is slightly larger at the base, allowing for a generous 20 degree bevel.  If you've ever tried to change mags at speed in competition (or in the dark while wearing NVGs) you'll appreciate this feature.

Magwell - Front

Magwell, Off Center Logo, and Left Side Mag Release Roll Pin

20 Degree Beveled Magwell
On the way are a Geissele SD-C Trigger, PWS Enhanced Buffer Tube with ratcheting castle nut, PWS H2 buffer, and JP polished buffer spring.  The remaining required small parts, stock, and grip are all from BCM.  I'll run this lower with one of my pinned 14.5" uppers for now.  I might SBR it but I like the idea of having a rifle I can transport out of state for training classes or hunting without filing ATF paperwork.  I'll make my decision after getting some trigger time and then write up my results.  It's going to be a good winter.

-Carry On


Thursday, November 17, 2016

Jagerwerx Glock RMR Cut and Cerakote Review

I've become a huge fan of red dots on handguns especially on my CCWs.  I've mounted a Trijicon RM07 on both an MOS slide and then a Unity Atom slide, both for Glock 19's.  While the Atom slide better than the MOS, there were a few minor issues aside from the major ones I had to fix.  One was how the trigger doesn't feel as smooth with the Atom slide as the factory one.  Maybe the trigger bar rubs it, or the striker channel is rougher, but it definitely "hitches" more in the draw stroke.  The slide chamfer starts too early and results is less than the full width of the slide supporting the RMR and its sealing plate.  The mounting plate relies solely on the screws to hold-zero and due to being made of aluminum, you have to be very careful not to strip the threads.  It also means the RMR is mounted a little higher than if it was on a machined slide.  The main reason I went with the Atom was because I had a Sage Dynamics defensive handgun class approaching and I didn't have time to send my slide out.  Fast forward a few months and I have found myself grabbing my Glock 26 to carry when I'm in a hurry and wearing a s'medium t-shirt.  I have a thin build so it prints less in non CCW optimized clothes with a 12 round magazine. While it doesn't have a light, I only grab it for short daytime errands like popping into a corner store for milk.  I do prefer it's short length if I'm spending a lot of time driving.  In the appendix position, it doesn't dig into me while seated.  I can comfortably drive a 6 hour stretch without removing the holster, something I could never do with the 19.  I use the 26 often enough that I purchased a 2nd RM07 and inquired about places to send it for milling.  ATEI of course comes highly recommended but another that came up a few times was JagerWerx.  Their turn-around time is quoted to under three weeks and their prices are very reasonable,  In fact, I was a little weary of them when I saw their price of $125 for an RMR cut,  Good, fast, and cheap...Pick Two, is a popular maxim and for good reason.  They do require sending in your RMR so they can cut the slide to fit it perfectly.  A few fellow shooters who I hold in high regard told me JagerWerx was good to go so I went ahead and placed an order.  I shipped them my stripped slide with barrel and recoil spring assembly, RMR, and Ameriglo suppressor sights in a USPS Flat Rate small box.  For $195.00, JagerWerx cut my slide for the RMR, cut a new dovetail for the rear sight, and bead blasted and refinished the slide with Tungsten gray Cerakote.  A new striker channel liner is included and installed with the refinish, but if you opt to skip the Cerakote, the slide will still come back bead-blasted and ready to accept the finish of your choice. They also installed the sights,and then laser aligned both the sights and RMR.  It also looks like JagerWerx used copper paste, similar to what comes on Glocks from the factory, to lubricate the rear sight for installation.


While I had the RMR off I examined the slide cut.  The machine work and finishing are impeccable.  It will be a shame to mar the beautiful dark grey finish, but I specifically chose this color for it's ability to wear gracefully.


It's worth noting that JagerWerx received my slide on a Thursday and completed the work on Saturday.  Including shipping both ways my slide was only out of my hands for 8 days.  It was so quick that I was only half-way finished with my frame stipple job.  I'm sure it would have taken a few days longer if I had opted for one of their more exotic slide cut packages, but I'm a man of simple tastes.

Unlike the Atom slide, the cut utilizes the full width of the slide to support the bottom of the RMR.  However, the slide still isn't wide enough and the o-ring squirts out between the rear serrations.  A sealing plate is still required.


I  headed to the range and shot a 5 round zeroing group at 25 yards.  I only needed 3 clicks up on the RMR to get zeroed.  I removed the RMR to add two pieces of electrical tape under the battery as insurance to keep the dot from flickering.


I added a drop of blue loctite to each screw and reinstalled the RMR.  The RMR slots into its recess snuggly with almost zero movement before tightening the screws down.  It almost "snaps" into place.  Another 5 shot group confirmed a perfect return to zero.  Compared to my Glock 19/Atom, the RMR'd Glock 26 is quicker from the holster and faster on target.  Shot back to back, I actually prefer the recoil characteristics of the G26.  It's snappier, but the muzzle settles down quicker.  It may have something to do with the balance shift and added weight of the RMR.  It's a shame I can't mount a light on the 26, but then I might as well chop the 19 grip.  Using just the irons sights does highlight both the drawbacks and advantages of such a short sight radius.  With the rear sight moved two inches forward, you trade a accuracy for speed.  The sights align fast, like Colt single action revolver fast.  It looks rock steady, but when you turn the dot back on you can see how much movement is masked by the 3" sight radius.  Also, the front post only takes up about half of the rear notch.  Keeping equal light between the spaces is challenging.  That's not to say you can't get headshots at 25 yards, you just have to be extra mindful of keeping a perfect sight picture.

RMR - 25 yards, Supported

Irons - 25 Yards, Supported
Still, I prefer the rear sight forward of the RMR for several reasons.  The rear sight cannot block the dot in the window and doesn't fight for your eyes attention when picking up the dot.  It also provides a little protection for the RMR window and is less likely to snag on clothing.  With the RMR mounted to the rear, it sits a little further away from ejecting shells and sits further away from the metal corner of my belt buckle, an Ares Gear Aegis.


I'm extremely happy with the work JagerWerx performed on my Glock 26.  I don't think I can ever again recommend the Atom slide for anyone wanting to run a red dot.  My next Sage Dynamics class will be the 2-day Vehicle Defense course.  With the G26 being my preferred vehicle carry pistol, it will be in attendance with the G19 as a backup.

-Carry On

Update: I think I might know why I prefer the way the G26 shoots over the G19.  The G26 RMR is mounted further to the rear than on the Atom slide.  This is because the Atom slide is designed to host not just mini red dot sights, but also larger optics like the Aimpoint Micro series.  I think the weight shift to the rear from both the lighter muzzle on the G26, as well as having the RMR further back, balances the weight in hand better for me.  Also, the RMR is mounted slightly lower on the slide, closer to the bore.  Finally, the iron sight radius ends up nearly the same for both guns.  I really prefer the milled slide for the RMR.  I get a lower mount, more available iron sight radius, and a little more distance for the RMR from the ejection port.

G26 milled above vs G19 Atom below

Nearly identical iron sight radius

Slightly lower profile on G26

Saturday, September 3, 2016

Bootleg Inc Upper Receiver and Adjustable BCG Initial Impressions

Six months.  That's how long I'll probably have to wait before the ATF sends my tax stamp for a Griffin Recce 5.56 suppressor.  I already have a Surefire Socom 7.62, but I wanted a dedicated 5.56 suppressor that was a bit shorter and lighter for training classes and HD.  To help me manage the interminable wait, I decided to get an upper receiver started for my silencer in waiting.  The core of the action is of course the upper receiver and the bolt carrier group.  I decided to go with Bootleg Inc for this build.  They are a division of Primary Weapon Systems that makes their parts for DI rifles.  Despite the outward appearance, their upper is forged, not milled, and deletes the forward assist.  I've never had to use my forward assist, and it tends to get in the way of my ambi-charging handles.  Also, my choice of bolt carrier does not have the teeth for the forward assist anyway.  Aside from the light weight and nifty design elements, there are a few small enhancements I appreciate.  The dust cover pin is captured at the rear, so you don't have to fumble with a c-clip. The barrel extension mounting area is max spec and a tighter fit than my Aero Precision upper, necessitating a few taps of the barrel with a dead blow hammer to get it seated.  The finish is impeccable inside and out, with no tooling marks anywhere to be found.
Bootleg Upper - Right

Bootleg Upper - Left

Bootleg Upper - Top Rear

Bootleg Upper - Top Front

Bootleg Upper - Inside Front

Bootleg Upper - Inside Rear
I already have an SBR'd lower, so I've settled on an 11.5" barrel from Faxon Firearms with a mid-length gas system.  The short dwell time is offset by the additional back pressure from the can.  The overall length and weight are within an inch and a few ounces of a 16" barrel, but without the pesky noise and fireball.  Perfect for training, the indoor range, HD, and the impromptu 3-gun outlaw match.  While I don't plan on running this rifle without the suppressor, I still want the ability to "go loud" without having to locate an allen key to adjust a gas block.  I already have an 11.5" upper for a Surefire suppressor with an SLR adjustable gas block.  It works well, but adjusting it requires taking off the can to access the adjustment nut.  The Bootleg carrier only needs a cartridge rim and can be done without removing the carrier, unlike the one from Gemtek.  It has four vent settings, though I've only had to use the min and max vent positions.  The gas key looks properly staked and everything is finished in Isonite, a form of nitriding.  It doesn't have a glossy finish like other nitrided carriers such as my JP Low Mass.  I suppose the matte finish is more "tactical" but I prefer the easy cleanup of a slicker finish.  It's covered by the dust cover anyway.
Bootleg Adjustable Bolt Carrier - Right

Bootleg Adjustable Bolt Carrier - Left

Bootleg Adjustable Bolt Carrier - Top

Bootleg Adjustable Bolt Carrier - Adjustment
You have to provide your own bolt, firing pin, retainer pin, and cam pin.  Faxon Firearms offers matched and head spaced bolts with their barrels, so I went with theirs.  The other small parts are from Bravo Company.
Faxon Bolt
Since my upper isn't quite finished, I threw the Bootleg carrier in my current 11.5" upper using its Fail Zero bolt.  It uses the same Faxon 11.5" mid-length barrel, but with an SLR Sentry6 adjustable gas block.  I turned the gas black to its max setting to get an idea of how well the carrier mitigates excess gas.  I use an H3 buffer and standard weight recoil spring.  I didn't lube the carrier and the bolt was bone dry.  I fired 30 rounds of Federal XM193 unsuppressed with no problems, casings exiting at two o'clock.  I attached my Surefire 762 suppressor and fired five rounds to see how the over gassed rifle felt, then turned the gas adjustment to the full suppressed setting, and fired five more.  The difference wasn't earth shaking, but very noticeable.  The action felt smoother, the gun stayed flatter, and I didn't get any gas directly in my face.  However, being at an indoor range, an acrid cloud lingered to my right.  I didn't shoot weak-side, but I can't imagine it would be pleasant.  It only started burning my eyes after I dumped the remaining 20 rounds in the magazine.  For fun, I tried the other two settings and I could feel the increase in gas pressure with each one.  I do like the ability to add a little more gas if needed.  I then moved the dial back to the suppressed setting, and began to turn down the gas at the gas block.  I was able to go from it's max setting (15 from closed) to 9 from closed, before the bolt wouldn't lock back.  This tells me that it's still a little over-gassed for a suppressed SBR.  For a longer barrel it's probably perfect.  I ended up shooting only 120 rounds suppressed.  I had to take frequent breaks to let the can cool down, and I had two other guns to sight in.  At home, I examined the carrier for abnormal wear and fouling.  While I only shot four mags suppressed, the carrier and upper weren't as dirty as I expected, about as bad as shooting Wolf in a 16" unsuppressed rifle.  It may have been the lack of lube to attract dirt.  In any case, almost all of the fouling wiped off with an old t-shirt.
Bootleg on bottom is dirty, JP on top  is clean

Bootleg dirty - JP clean

BCG and parts after 120 rounds suppressed
One range session and 150 rounds aren't enough to make any definitive conclusions about Bootleg Inc's adjustable bolt carrier.  I also can't say for certain if I prefer it or the SLR Sentry adjustable gas block.  With the Sentry, I can get the gun perfectly gassed, without the eye watering cloud in front of my right shoulder.  With the Bootleg, adjustments are easier, though coarser, but it's less likely to fail or come out of adjustment since it's dealing with much lower temperatures and pressures.  My gut says to run the SLR on anything that isn't a defensive gun.  Since my new upper and Griffin suppressor will take on a primarily defensive role, that's probably where the Bootleg will go.

-Carry On

Thursday, September 1, 2016

SLR Rifleworks Sentry6 Adjustable, GB6 Micro Gas Block, and Barrel Dimpling Jig

My quest was simple.  To build a suppressed AR15 that weighs under 8 lbs unloaded.  Since I was using a JP Low Mass Bolt Carrier, I knew I'd need some way to keep the gun from overgassing the hell out of the bolt carrier with the Surefire 762Mini attached.  I looked at various adjustable gas blocks, but I didn't like their use of tiny coil springs and detents in one of the hottest areas of the gun.  Heat and springs don't mix.  I wouldn't be adjusting it often as the suppressor would almost never leave the rifle, but I wanted something I wouldn't have too constantly worry about.  

SLR Sentry6
Enter the SLR Sentry6.  Unlike other gas blocks, this utilizes a flat leaf spring tempered to 1400 degrees F.  Being external, it is exposed to cool air and is easy to rebuild if needed.  Everything is finished in Melonite QPQ to avoid corrosion, and the adjustment screw is in the front of the block, making adjustment a snap under any free-float rail with a long enough hex driver.  The black finish is smooth and even, and there is a starter hole on the right side for drilling and pinning.  There are also three vertical lightening cuts in the side, though probably more for aesthetics than weight savings.  SLR's Dimpling Jig made dimpling my nitrided barrel a snap with a hand drill.  I recommend a cobalt drill bit to make short work of the hard finish.  The Sentry6 slid easily onto the barrel with a little wiggling and fit snugly with zero perceptible wobble.  I added a dab of Rocksett to the set screw threads with a toothpick and secured them at 25 in/lbs.  Next I setup the barrel and gas block under a drill press and drilled the .125" retaining pin hole.  This is considered by many to be unnecessary.  While taper pins are the strongest way to secure a gas block to a barrel, they are used with a traditional FSB, where the front sight tower will likely get knocked around.  For a gas block protected under a rail, set screws and Rocksett should be secure enough.  However, I like my stuff to be bullet-proof.  I opted for stainless steel solid groove pins.  These are much stronger than a roll/spring pin so heat shouldn't be an issue at all.  The pin is actually slightly tapered, but unlike a traditional taper pin, three grooves are cut into the sides allowing it to compress inside a straight hole, so you can use a standard drill bit instead of a taper reamer.

SLR Sentry6 - Gas Screw
SLR Sentry6 - Grooved Pin
SLR Sentry6 - Bottom
SLR Sentry6 - Leaf Spring
SLR Sentry6, MI 10.5" G3 Rail, Faxon 11.5 Mid-Length, Surefire SFMB556
This setup gives easy access to the adjustment screw
SS Grooved Pins - McMaster-Carr Part# 98400A602
1/8" Cobalt Drill Bit - McMaster-Carr Part# 3069A16
The Sentry6 has 15 gas positions and makes 1 full revolution every 3 clicks.  My setup is an 11.5" Mid-Length Barrel, JP Low Mass Carrier, 3oz CAR Buffer, and Surefire SOCOM 556 Muzzle Brake with Warden attached.  I started at position 4 from closed.  I had to open it up to position 7 until it would lock back on a magazine.  With the Surefire 762 Mini attached, I had to turn the screw down to setting 4.  I then added an extra click open for reliability in case the screw got fouled.  More likely though, is that the metering screw will get eroded by hot gas and I'll actually need to close it some as it starts to over gas the BCG.

That was a few months ago.  Since then, I replaced the 3oz CAR buffer with an H3.  Shooting suppressed gets the action really dirty, and the extra weight of the H3 buffer helps with reliability after a few hundred rounds if I don't have a chance to cleam/lube the bolt carrier.  I had to turn the gas screw out to 9 from closed.  I'm also waiting on a Form 4 for a Griffin Recce5 Mod 3.  It, and the taper mount muzzle brake, are both a few ounces lighter than the Surefire and its brake.  I like using brakes with my cans to act as a sacrificial baffle.  I started building a new upper for it, this time ordering an adjustable bolt carrier from Bootleg Inc.  I liked the idea of adjusting the gas at the bolt carrier for three reasons.  First, the gas at the BCG is much cooler and at a lower pressure than at the gas block.  As the hot gasses erode at the adjustable gas blocks metering screw, it can allow the rifle to get more over gassed as time goes on.  Eventually it must be replaced.  Second, the heat generated at the gas block is going to effect its small parts more than at the BCG, increasing the likelihood of parts failure.  Finally, the adjustment at the BCG is much easier to accomplish, so I can "go loud" with just the turn of a cartridge rim.  I decided to stick with SLR for the gas block, this time their non-adjustable one.

The SLR GB6 Micro is a simple affair.  Like the Sentry6, it is has a Melonite QPQ finish, lightening cuts, and a started pinning hole.  It installed just like the Sentry6 with no drama.  You can view the install here: Dimple and Pin an SLR Gas Block
SLR GB6 Micro
SLR GB6 - Right
SLR GB6 - Left
SLR GB6 - Front
SLR GB6 - Rear
SLR GB6 - Top
SLR GB6 - Bottom
The SLR Dimpling Jig is as nicely machined as their gas blocks.  This version for .625" front sight bases is nicely anodized bright orange.  The machined ridges are unnecessary but a nice touch.  There are flats on the side for securing in a vice.  It has two sides. One for .400" spacing and one for .450"  I used Cobalt Bits from McMaster-Carr to and a hand drill at high speed to drill the dimples.
SLR .625" Gas Block Jig, Gas Port Locating Screw, Dimple Bushing

Position Locating Screw Over Gas Port
Mine slid on easily.

Lightly tighten Locating Screw into Gas Port

Drilling Rear Dimple w/ 5/32" Cobalt Bit
McMaster-Carr Part# 3069A18

Drilling Front Dimple